In times of emergency, access to clean water is critical. It is crucial to have a well-thought-out strategy when it comes to storing and retrieving water during emergencies, whether they are brought about by natural disasters or any other unexpected situations. Being prepared is key. But how do you store water for an emergency situation? And what precautions should you take?
Storing water for emergencies involves choosing appropriate containers, storing them in good locations, and replacing them on time. Each of these elements should be thoughtfully examined to ensure safe, efficient, and reliable emergency water storage.
In this article, you’ll learn how to store water for emergencies, so you can be prepared and feel safe no matter what happens. So let’s dive in!
How Much Water Should You Store For An Emergency?
Water is an essential element for human survival, and it becomes even more crucial during emergencies. Experts recommend storing at least one gallon of water per person per day for drinking and basic hygiene needs. This means that a family of four should store at least 16 gallons of water for a three-day emergency, and 48 gallons for a two-week emergency.
When deciding how much water to store, consider your family’s needs and the number of people in your household. It’s always better to err on the side of caution and store more water than you think you’ll need. Keep in mind that children, pregnant women, and people with medical conditions may require more water.
It’s worth mentioning that although commercially bottled water is a suitable choice for emergency situations that are brief, it may not be a feasible or financially sound option for storing water in the long haul. In such cases, consider using food-grade plastic containers or clean barrels specifically designed for long-term storage.
In addition to storing enough water, it’s equally important to replace stored water regularly as stagnant water can become contaminated over time. We’ll explore this topic further in the next section: “When to replace Your Emergency Water Supply.”
Where to store your emergency water supply?
Once you have decided on the amount of water you need to store for an emergency situation, the next step is to consider where to store it. The storage location should be easily accessible and cool, dry, and dark to prevent bacterial growth and algae formation.
When selecting a container for your emergency water supply, ensure that it is made from food-grade plastic or glass. Avoid using containers that were previously used for non-food items such as chemicals or cleaning supplies as they may contain harmful residues.
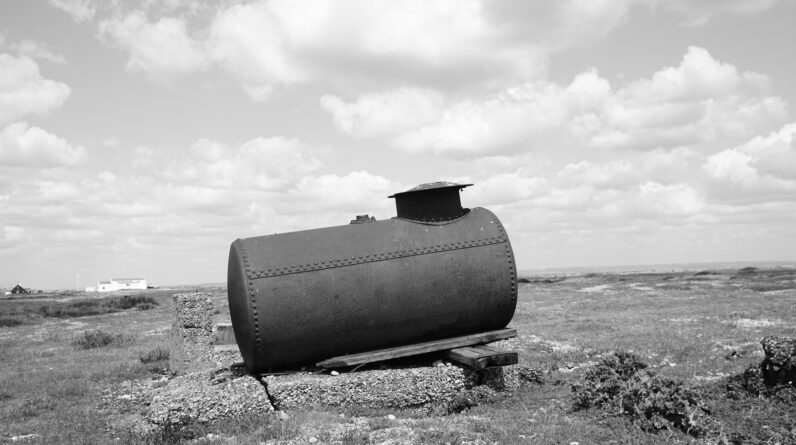
Large 55-gallon barrels are a popular option for long-term water storage as they can hold a significant amount of water. However, they take up more space than smaller containers like gallon jugs or quart bottles.
Store your emergency water supply in various locations in your home, such as under beds or in closets, to save space. This will also help ensure that if one source becomes contaminated, you still have access to clean drinking water from another source.
Remember to label all containers with the date that the water was stored and when it needs to be replaced. Make sure to replace your emergency drinking water every six months at least to keep it fresh and safe to drink.
To keep your drinking water safe, add chlorine drops or bleach solution to each container before filling it with tap or filtered water. Follow the instructions carefully to avoid contamination. Chlorine dioxide tablets are also available in stores specifically designed for treating large volumes of stored drinking-water without affecting taste.
To ensure safety, store liquids in a cool, dark place away from chemicals, in food-grade plastic or glass containers labeled with the filling date. To disinfect large quantities of liquid, use bleach, sodium hypochlorite, or chlorine dioxide for several minutes based on size and contents. This can be especially important in emergency situations where lives are at risk.
When to replace your emergency water supply?
One of the most important things to keep in mind when storing water for an emergency situation is that it doesn’t last forever. Over time, stored water can become contaminated or develop a stale taste, which can make it unsafe to drink. As a general rule of thumb, you should aim to replace your emergency water supply at least once every six months.
However, there are some factors that can affect how long your stored water will last. Using plastic bottles or containers to store your water may lead to the breakdown of these objects over time, which can result in the release of chemicals into the water itself. This poses a risk to your health and well-being. Similarly, if your storage container wasn’t properly sanitized before use, bacteria and other contaminants could grow inside.
To ensure that your emergency water supply stays safe and drinkable for as long as possible:
- Store it in a cool and dark place away from direct sunlight.
- Keep it away from any chemicals or hazardous materials.
- Use food-grade containers made specifically for storing drinking water.
- Treat it with chlorine bleach (using 8 drops per gallon) or iodine tablets (using one tablet per quart) before storing AND after replacing the supply.
- Consider investing in a filter or purifier designed for emergency situations.
Remember: Your emergency water supply is just that – meant for emergencies only! Don’t dip into it unless absolutely necessary. And always have backup plans in case your primary source becomes contaminated or runs out sooner than expected.
In the following section, we will examine the appropriate and inappropriate containers to use for the storage of your emergency water supply. Learn the best type of containers to use for storing water to keep it safe and drinkable. Avoid using containers that are not recommended. This will ensure that your water stays fresh and safe for use when you need it.
Types of containers to store your emergency water supply
Choosing the right container to store your emergency water supply is essential. The container should be made of a food-grade material and have an airtight seal to prevent contamination. Here are some options:
- Plastic Bottles: Lightweight and easy to transport, plastic bottles are a popular option for storing emergency water. Make sure they are BPA-free and have been thoroughly cleaned before use.
- Large Water Containers: If you need to store a larger amount of water, consider using large containers such as 5-gallon jugs or even 55-gallon barrels. These containers are durable and can last for years if properly maintained.
- Glass jars or bottles: could serve as an effective container for storing drinking water during an emergency, but there’s a concern about their durability and sturdiness. Thus, it’s essential to ensure that these jars or bottles are constructed with heavy-duty materials that won’t break easily. Using such a container for emergency water storage would be a wise and proactive step in ensuring your preparedness for unforeseeable situations.
- Aluminum Cans: Aluminum cans offer another option for long-term storage, but they must be coated on the inside with a food-grade finish.
Types of containers to avoid:
When storing water for an emergency, it’s important to select the appropriate containers that are safe and won’t contaminate your water supply. Here are some types of containers you should avoid:
- Do not use milk jugs or juice containers for storing water long-term, as they may break down and lead to leakage and contamination.
- Non-food-grade plastic containers – Some plastics may contain chemicals that can leach into your water supply over time, particularly if exposed to heat or sunlight.
- Narrow-necked bottles – While these may be easy to handle, they can be difficult to clean thoroughly and sanitize properly.
- Avoid using used buckets or barrels to store drinking water. These containers may have been contaminated with other substances, which could affect the safety and taste of your stored water. Always use food-grade containers specifically designed for drinking water storage.
- Containers manufactured with metal or glass are often simpler to sanitize than plastic ones, but their weight and fragility tend to be greater, which could be a drawback for some users.
When choosing a container for emergency water, pick ones that can hold at least one gallon of water per person per day. This will ensure that you have an adequate water supply to sustain you during an emergency. If you have pets, consider getting a container that can store more water. Make sure the container has a tight-fitting lid to prevent contamination and spills. It’s also important to choose a container made of food-grade material approved by the FDA to ensure your safety. Remember: always sanitize any new container before use according to the methods outlined in the next subheading below.
How to sanitize your storage container:
Before storing water in any container, it is crucial to clean and disinfect it properly. Most containers come with a residue of dust or dirt that can contaminate the stored water. To sanitize your storage container, follow these steps:
- Clean the container thoroughly using soap and warm water.
- Rinse the container with clean water several times until there is no soapy residue left behind.
- Disinfect the cleaned container by using bleach or iodine solution.
For bleach solution, use only unscented household liquid bleach that contains 5-6% sodium hypochlorite and avoid using color-safe or scented bleaches. Add 8 drops (or 1/8 teaspoon) of bleach per gallon of water if you are treating clear water and 16 drops (or 1/4 teaspoon) if you are treating cloudy or dirty water.
For iodine solution, use only pure crystalline iodine, not tinctures containing alcohol as they may be poisonous when ingested in large quantities. Add five drops of iodine per quart of clear tap-water for emergency disinfection purposes.
- Close the lid tightly on your sanitized container and let it stand for at least 30 minutes before pouring out the treated solution.
- Rinse again with clean drinking-quality water before filling it up with your emergency supply.
Methods of Disinfection
There are several methods of disinfection that you can use to treat your emergency water supply.
Here are some of the most common ones:
Boiling
Boiling is one of the most effective ways to disinfect water and make it safe to drink during an emergency situation. To do this, you’ll need a heat source, a pot or kettle, and access to clean water.
First, fill your container with water and bring it to a rolling boil. Let the water boil for at least 1 minute if you live at sea level or for 3 minutes if you are at an altitude above 6,562 feet (2,000 meters). After boiling, let the water cool down before drinking. This will help prevent burns.
It’s important to note that boiling won’t remove any chemical contaminants from your water. However, it is an effective way of killing bacteria and viruses that may cause illnesses during a disaster scenario.
Chemical Disinfection
Chemical disinfection is a popular method to treat water for emergency situations. This method usually involves using household bleach or iodine tablets to kill any bacteria or viruses that may be present in the water.
To use bleach, you’ll need to add approximately 8 drops of regular liquid bleach (containing 6% chlorine) per gallon of water. Make sure to mix thoroughly and then let the solution sit for at least 30 minutes before drinking. If the water has a strong taste or odor after treatment, pour it back and forth between clean containers until it tastes fresh.
Iodine tablets are another option for chemical disinfection. One tablet can treat up to one quart of water, while larger tablets can treat several gallons at once. Follow the instructions on the packaging carefully, as different brands may have varying amounts needed per volume of water.
Chemical disinfection doesn’t remove impurities like chemicals or heavy metals from the water; it only kills bacteria and viruses. For long-term storage, consider using food-grade plastic containers or barrels with proper filtration systems.
In a disaster where there is no clean drinking water available, you should have chemical disinfectant to treat water for your family’s needs until help arrives.
Liquid Bleach
When it comes to disinfecting your water storage container, liquid bleach is a popular option. Household bleach typically contains between 5-8% sodium hypochlorite, which can effectively kill bacteria and viruses in your water supply.
To use liquid bleach for disinfection, you will need to determine the amount needed based on the size of your container. To disinfect a quart-sized container, use four drops of chlorine bleach or half a teaspoon. For a 55-gallon barrel, use one cup or 16 tablespoons of chlorine bleach.
It’s important to note that not all containers are suitable for storing water with bleach. Don’t use plastic bottles not meant for food storage for a long time to avoid chemicals from leaching into your drinking water. Instead, opt for large containers made specifically for emergency water storage or food-grade barrels that have been thoroughly cleaned before use.
Once you’ve added the appropriate amount of bleach to your container and filled it with clean water from a safe source, stir or shake well and let it sit for at least 30 minutes. After this time has passed, check the smell and taste of the treated water; if there is still any hint of chlorine odor or taste, you’ll need to repeat the process until all traces are gone.
Liquid bleach is an effective method of disinfecting your emergency water supply and ensuring its safety during times of disaster or contamination. However, keep in mind that this method is only suitable for short-term storage (up to six months). If you’re looking at long-term options (over one year), consider using other methods such as filtration systems or iodine tablets instead.
Iodine Tables
Iodine tablets are a convenient and effective option for disinfecting water in an emergency situation. They can kill most bacteria, viruses, and protozoa that may be present in the water. To use iodine tablets to treat your emergency water supply, follow these steps:
- Fill your container with the desired amount of water.
- Calculate how many iodine tablets you’ll need based on the instructions on the packaging.
- Crush or break up the tablets into smaller pieces if necessary.
- Drop the required number of tablets into your container of water.
- Wait at least 30 minutes before using or drinking the treated water.
It’s worth noting that iodine-treated water can have a slight aftertaste, which some people find unpleasant. It’s also not recommended for pregnant women or people with thyroid problems to consume too much iodine.
Although iodine tablets can be useful in emergency situations to treat water supplies, they should not be used as the main method for obtaining drinking water because high levels of exposure to iodine can cause health risks.
Halazone Tablets
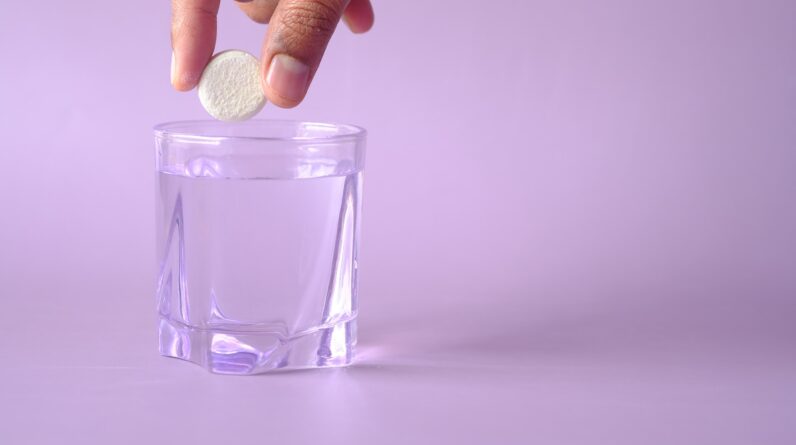
Halazone tablets are a popular option for water disinfection in emergency situations. These tablets release chlorine when dissolved in water, killing bacteria and viruses that may be present. One tablet can treat up to one quart of water, while larger containers may require multiple tablets.
It’s important to note that these tablets may not be the best option for long-term storage, as they only provide short-term disinfection. Additionally, some people find that the taste of chlorinated water is unpleasant. When in an emergency and need to disinfect a small amount of water for immediate consumption, Halazone tablets can be a great choice for quick and easy treatment.
When using Halazone tablets, always follow the instructions carefully and use the recommended amount per gallon or quart of water. It’s also important to store them properly in a cool, dry place away from direct sunlight or heat sources.
Halazone tablets are easily accessible and can be purchased at most outdoor stores and online shops. Although there are other chemical alternatives to disinfect water in cases of emergency, They are a more convenient option. Consider keeping a few on hand as part of your emergency preparedness kit.
Conclusion
Water is essential for survival, especially in emergency situations. The quantity of water that one should keep in store for an emergency situation is determined by multiple factors, including the number of individuals in your home and the length of the emergency. It’s recommended that you store at least one gallon of water per person per day for drinking and sanitation purposes.
When it comes to storing water, it’s important to consider how long you can safely store it before it becomes contaminated or unsafe to drink. For short-term storage (less than six months), using clean food-grade plastic bottles or containers is a good option. Make sure to label each container with the date you filled them so that you can keep track of when they need to be replaced.
For long-term storage (more than six months), using larger containers like 55-gallon barrels may be necessary if space allows. These should also be made from food-grade materials and specifically designed for long-term water storage. You should also consider adding a filter or treating the stored water with chemicals like bleach or iodine tablets every six months.
It’s worth bearing in mind that even if water is stored appropriately and treated well, it may still acquire an unpleasant flavor as time goes by due to chemical reactions in the container material or the growth of bacteria. To avoid this issue, try rotating your supply every 6–12 months if possible.
Storing enough clean drinking water is crucial during emergencies and disasters. Be sure to use appropriate containers made from food-grade materials, and treat your stored water regularly with chemicals like bleach or iodine tablets depending on how much you have stored away – otherwise bacteria could contaminate everything quickly once opened up again after being sealed away for too long!